![]()
Amstrad Notepad NC100 Manual
SECTION 2
Transcribed from the NC100 manual by Gavin Taylor.
- Powering the Notepad
- Switching Off
- Automatic Power Off
- Switching On
- Getting Around
- Advice for Beginners
- Short Cuts
- Single Key Operation
- Memory
- Expanding the Memory
- Word Processor
- Calculator
- Address Book
- Calendar and Diary
- Time Zones
- Alarm Calls
- Secret Information/Password Lock
- System Settings
Powering the Notepad
Most of the time you will probably use the batteries to power your Notepad, these will enable you to work for approximately 35 to 40 hours, when they need to be replaced a warning message is flashed on screen telling you to replace the batteries.
| xxxxx battery is low, Please switch off and replace battery - - - |
|---|
Use alkaline type AA/LR6 1.5V or if preferred you can fit rechargeable (NiCad) batteries; these will provide about 5 hours of working time before needing to be re-charged.
You can conserve the life of the batteries by connecting to the mains supply when you are working at home or in your own office.
When there is no other source of power (when replacing the AA batteries for example) the lithium battery will maintain your work in the Notepad memory (the estimated life of the lithium battery is 5 years). If the lithium battery needs replacing you will see the message "Lithium battery is low----" . Ensure that good alkaline batteries are fitted or the mains adaptor connected while you replace the lithium battery. You must use a CR2032 type battery which can be purchased at many electrical or photographic shops.
| Warning: If all power sources are disconnected all the stored information (documents, addresses, diary entries etc.) will be permanently lost from the Notepad memory. |
| WARNING Your Notepad contains a Lithium battery. Danger of explosion if recharging is attempted. Replace the Lithium battery with the same type recommended by Amstrad plc. Do not dispose of the old Lithium battery in the fire. |
Switching Off
You can switch off your Notepad at any time while you are using it and the work you are doing will be stored.
When you switch on again you will be returned to the Main Screen. You may see the following message on screen for a few moments:
| storing .... |
|---|
This will sometimes occur when you switch off while there is a word processor document on the screen.
Automatic Power Off
If you leave your Notepad switched on but don't touch any of the keys for five minutes it will automatically switch itself off to conserve power.
The five minute period can be changed using the Systems Setting menu (press MENU key at the Main screen) but be careful, if you set the power off delay to zero, automatic power off will not occur and your batteries will be drained.
Switching On
When you switch on the Notepad you will be returned to the main screen unless the Notepad automatically powered off the last time you used it, then you will be returned to whatever you were doing at the time. This is called "Preserving the context".
If you would prefer that your Notepad always preserved the context when you switch on, change the "Preserve context during power off" setting in the System Settings menu.
Getting Around
From the main screen you can access all parts of the Notepad program by holding down the YELLOW key then pressing the RED, GREEN or BLUE key (the messages on screen tell you which key to press).
The left, right, up, and down arrow keys
When using your Notepad you will find that sometimes the coloured keys are referred to on the screen by their colour and at other times by the arrow symbols printed on them.
The STOP key
Press STOP at any time to finish what you are doing and return to the previous screen. You may have to press STOP several times to return you to the main menu.
Advice for Beginners
When you first use your Notepad you may find you "get lost" especially when using the more complicated word processor features and pressing STOP will enable you to escape. As you become familiar with your Notepad you will use the STOP key less as you learn the short cuts.
Short Cuts
You can short-cut the menus on your Notepad and go directly to the part you wont using special key combinations to avoid having to return to the main menu. For all the short cuts hold down the YELLOW FUNCTION key and press another key.
- FUNCTION WORD
- To the word processor or returns you to the document you are typing
- FUNCTION N
- Start a New document
- FUNCTION L
- To the List of stored documents
- FUNCTION P
- To Print a document
- FUNCTION CALC
- To use the Calculator
- FUNCTION DIARY
- To the Diary menu
- FUNCTION D*
- To the aDdress book
- FUNCTION C
- To the Calendar/diary
- FUNCTION T
- To the Time manager
- FUNCTION A
- To the set Alarm call menu
- FUNCTION Z
- To time Zones manager
- FUNCTION X
- Run memory card program (JEIDA/PCMCIA)
- FUNCTION S
- Serial terminal program
- FUNCTION B
- Go to BASIC programming
- Note: to exit BASIC type *BYE and press RETURN
- FUNCTION MENU
- Enter password for secret information
*Use this to insert an address from your address book into the document you are typing.
You can use the key combinations above to quickly move from one part of the program to another without returning to the main menu, for example while typing a document in the word processor, hold YELLOW and press GREEN to use the calculator, then to return to the document hold down YELLOW and press RED.
Single Key Operation
To assist the disabled the Notepad has been designed so that it can be operated using only one key at a time using the "sticky shift" feature. Sticky shift has to be switched on at the System Settings Menu.
The way sticky shift works is that instead of having to hold down the FUNCTION, CONTROL, SHIFT, or SYMBOL key while pressing another, the keys can be pressed one after the other.
At the main menu sticky shift will always work, for it to work at other times you must switch it on at the System Settings Menu:
- Press MENU at the main screen.
- Press the down key until you reach "Sticky shift".
- Press the left or right keys until "Yes" shows on the screen.
- Press STOP.
Memory
There are about 49,000 bytes of memory available on the Notepad for your "data", that includes all the information you type in: documents, addresses, diary entries, and alarms.
When you start to run out of memory your Notepad will give you a warning. To make space in the memory you will have to delete some of your documents. Refer to the Word Processing section below for instructions on how to do this.
Expanding the Memory
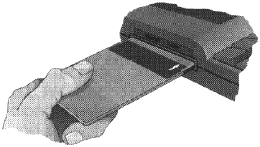
You can increase the memory by the use of industry standard SRAM cards (JEIDA/PCMCIA cards) that can be inserted into the MEMORY CARD slot on the Notepad.
Memory Cards with up to 1 MB capacity can be used with your Notepad. Instructions for looking after the cards, fitting the battery, write protection, etc are supplied with the card.
The card must be "formatted" before you can use it. Insert the card into the slot then select the List STORED DOCUMENTS screen (hold own FUNCTION and press L) then press MENU. Select "Format Memory Card" and press RETURN.
With the memory card loaded documents and addresses are automatically stored on the card. Documents and addresses that are already stored in the Notepad memory can be transferred to the card (see the instructions in the Address Book chapter and the Word Processing Guide).
Note that you should always switch the Notepad OFF before inserting or removing a memory card.
Word Processor
Introduction
The Word Processor is designed to be simple to use but has many advanced and powerful features. With very little instruction a beginner can type a document without needing to understand any of the advanced features while the experienced user will find that many of the features available on their usual word processor are also available on the Notepad.
If you are a beginner at using a computer or word processor read the first section of this book that gives simple step by step instructions to get you started. Remember that you cannot harm your Notepad by pressing the wrong keys, so don't be afraid of trying things out (if, while doing this, things happen that you don't understand press the STOP key until you return to the main screen or a screen you do understand).
For detailed information and instructions on word processing read the front section on this book and the Word Processing Guide later in this book.
Features of the word processor
Features that are available include: Spell checking, mail merging, word count, cut and paste, find and replace, keyboard macros, accented characters, case changing, and un-delete.
The Notepad date and time, and addresses from the Notepad address book can be directly inserted into a document.
Press the MENU key during word processing or use the key combinations listed on the Notepad "Template" (just beneath the LCD) to access all these features.
Transferring Documents
Documents can be transferred to other computers via the serial port using the in-built terminal program supplied with your Notepad.
The documents can be transferred in the "Protext" format for further editing within Protext on your PC or Amstrad PCW, or can be converted to ASCII format before transferring so they can be loaded info other programs.
The Notepad word processor is a special version of Protext by Arnor, if you would like to buy a copy of Protext for your desktop computer (IBM compatible PC Amstrad PCW or other) it is available from computer dealers or direct from Arnor Ltd, 611 Lincoln Road, Peterborough PE1 3HA (telephone 0733 68909).
Update: For free versions for the PC, Amiga and Atari see http://www.tigerteam.co.uk/protext/
The Template
Printed just below the screen of your Notepad is the quick reference template. Use it while word processing to remind you of some of the key combinations required. For the activities printed in yellow hold down the YELLOW FUNCTION key then press the key indicated (one of the keys along the top of the keyboard), for those in white hold down CONTROL and press the key indicated.
Some of the operations take place as soon as you press the keys, and have an obvious effect, others you will need to learn how to use. For example, if you hold down FUNCTION and press = all the Words are counted and a message appears on the screen stating the total number of words in your document, but if you hold FUNCTION and press 7 a "menu" appears on screen with various options.
Calculator
Hold down YELLOW FUNCTION and press GREEN CALC. For quick access to the calculator from another part of the program use the same key combination.
The calculator works in a similar way to most simple pocket calculators.
| Calculation | Example | Operation | Answer |
|---|---|---|---|
| Arithmetic | 15x2+7= (-32)÷8 -2= | 15 (x) 2 (+) 7 (=) 32 (±) (÷) 8 (-) 2 (=) | 37 -6 |
| Constant | 30+25= 25+90= | 25 (+) (+) 30 (=) (25 constant) 90 (=) | 55 115 |
| 22-33= 95-33= | 33 (-) (-) 22 (=) (33 constant) 95 (=) | -11 62 | |
| 15x4= 45x4= | 4 (x) (x) 15 (=) (4 constant) 45 (=) | 60 180 | |
| 45÷3= 354÷3= | 3 (÷) (÷) 45 (=) (3 constant) 354 (=) | 15 118 | |
| Percent | 15% of 150 | 150 (x) 15 (%) | 22.5 |
| 13 as a % of 40 | 13(÷) 40 (%) | 32.5 | |
| Add-on | Increase 150 by 15% | 150 (+) 15 (%) or 150 (x) 15 (%) (+) (=) | 172.5 |
| Discount | Decrease 350 by 15% | 350 (-) 15 (%) or 350 (x) 15 (%) (-) (=) | 297.5 |
| Square root | Square root of 45-29 | 45 (-) 29 (=) (Ã) | 4 |
| Summation using Memory | 32 x 3= - (62÷2) + (53 + 22) =Total | (MRC) (MRC) (CF/C) 32 (x) 3 (M+) 62 (÷) 2 (M-) 53 (+) 22 (M+) (MRC) | 96 31 75 140 |
| Temporary memory | (16-(8 x 3)) x (27-13) =Total | (MRC) (MRC) (CE/C) 16 (M+) 8 (x) 3 (M-) 27 (-) 13 (x) (MRC) (=) | 24 -112 |
Clear the calculator memory before performing a new calculation by pressing MRC twice then CE/C.
A small letter M appears in the display when something is stored in the memory. Press MRC twice to clear the memory.
A small letter K appears in the display when the constant feature is being used. Press CE/C to clear the constant function.
You will see a flashing E in the top left of the display if an error occurs during a calculation or if calculation results in a number too large to be displayed. Press CF/C to clear this.
Unlike a normal calculator you can use DEL to delete wrongly entered numbers.
Press STOP to return to the main screen, or use one of the "Short-cut" methods to return to the screen you were using before the calculator.
Address Book
For step by step instructions read Section 1.
From the Main Screen hold down YELLOW FUNCTION and press BLUE DIARY. To access the Address book from another part of the Program hold down YELLOW FUNCTION and press the D key.
It you have not used the address book before, and there are no addresses stored, you ore taken directly to the screen where you can type in the first address:

When you press RETURN at the bottom of the card the next blank card appears on the screen ready for you to enter the next address.
When you have finished entering addresses, press STOP. The Address Book Menu is now displayed:

To "Browse" through the addresses use the LEFT/RIGHT ARROW keys. All the other options can be carried out either by pressing the initial letter of the option or selecting the option using UP/DOWN ARROW keys then pressing RETURN.
- (A)dd New Address:
- Select this when you want to add a new address to the address book.
- (E)dit Address:
- Use to amend the address card showing on the screen - to amend one of the other cards, first use "Browse" to find the card then press the E key.
- (D)elete Address:
- Delete the card on the screen - select the card you want to delete using "browse" then press the D key. Confirm that you you want to delete the card by pressing the Y key for Yes, or if you have changed your mind press the N key for No.
- (F)ind Address:
- Find a particular address card - it you have lots of addresses this will be quicker than using "Browse" to find the address you want. When you press the F key you will be asked to enter the Name to Find, type in the name or any part of the address or telephone number and press RETURN. If there is more than one occurrence of the text you have typed press the F key then RETURN until the address you want is displayed.
Press STOP at the menu to go back to the Diary screen (press STOP again to go back to the main screen).
Storing the address book on a Memory Card When a memory card is loaded the addresses you type will automatically be stored onto the card. If you already have addresses stored in the Notepad memory they will be transferred to the card when you access the address book.
The addresses are only stored on the card, so if you remove it from the Notepad your address book will be blank. If you insert new addresses info this blank address book they can be merged info the address book on your card later. To merge the addresses. switch off your Notepad, insert the memory card and switch on again. Access the address book in the normal way (you will only be able to find the addresses stored in the Notepad memory) then press STOP you will see a message similar to the following.

Press the M key to merge the addresses, if you press STOP the addresses will not be merged
Calendar and Diary
For step by step instructions read Section 1. Hold down FUNCTION and press DIARY then press GREEN.

Use the LEFT / RIGHT / UP / DOWN arrow keys to move around the calendar as indicated on the right hand side of the screen. The months and years change only when you are against the edge of the calendar.
Pressing LEFT / RIGHT / UP / DOWN with SHIFT will move a month or year at a time when the cursor is in the middle of the calendar.
The time and date are shown on this screen for your reference only, if you need to adjust the time or date go to System Settings (you should only need to do this if you set it incorrectly in the first place or when, if you are in the UK, the clocks change to British Summer Time).
To make a diary entry, position the cursor on the relevant date on the calendar and press RETURN. Type the details of your appointments and relevant information into the diary editing screen:

Using the diary is similar to typing a document in the word processor (although it cannot be printed). When you have finished press STOP, the diary entry is indicated on the calander with an asterisk (*).
Diary Reminder
When you switch on the Notepad and there is a diary entry far the day, a message will show on the screen and a beep with sound to remind you to read your diary. This will continue every time you return to the main screen until you have read your diary by pressing RETURN whilst at the main screen.

When you have read the diary entry press STOP, you have the option of deleting the entry if you wish:

Time Manager
Notepad Alarms and the International Time Zones are accessed from the Time Manager screen.
Time Zones
For step by step instructions on using Time Zones read Section 1.
From the main screen hold down YELLOW (FUNCTION) and press BLUE (DOWN) then press BLUE again to go to the Time Manager.

Your Notepad has been set up to show the time in London, Central Europe, New York, Los Angeles, Sydney and Tokyo, you can change these to any six cities you require.
Select the City to change using the cursor keys then press the E key, type in your new city name and press RETURN then use the UP DOWN cursor keys to change the time difference then press RETURN.
Current Time Zone
When you travel to a country that is in a different time zone select that zone as the "Current time zone". The other zones will adjust to give the time difference relative to where you are staying. Selecting the new current time zone will automatically adjust the time and place shown on the top of the Notepad screen. but will not change the times set for your alarm calls.
Alarm Calls
For step by step instructions on Alarm Calls read Section 1.
Hold down YELLOW (FUNCTION) and press BLUE (DOWN) then press DOWN at the Time Manager screen. Press RED (LEFT) to go to the "Set alarm call" screen:

Follow the instructions on the left of the screen; you have to set the time first, then set the date and type in your message - note that messages are limited to 42 characters.
When you press D to edit the date it changes from "Once Only" to "Repeats every day". Press UP DOWN to set a specific date, to return to "Repeats every day" use UP or DOWN until you reach the beginning or end of the month then press the key once more.
Advanced Feature: To set an alarm for the same time on several days of the week press D to adjust the date then hold down SHIFT and press MENU and you will see the following:

Each day of the week is represented by one letter, use the RETURN or LEFT keys to move the cursor from one day to the next then use the UP or DOWN key to cancel the days you do not want the alarm. So for example an alarm that you want on Monday, Wednesday and Friday might look like this:

Press STOP when you have finished.
To set an alarm call for 24 hours hence just press RETURN RETURN at the Set Alarm screen.
To change the time, date or message of an alarm call
At the main screen hold down YELLOW (FUNCTION) and press BLUE (DOWN), press BLUE again at the "Diary menu" then press GREEN. The short cut method is to hold down YELLOW (FUNCTION) and press T then press GREEN.
To get quickly to the "Set alarm call" screen from any other part of the program hold down YELLOW (FUNCTION) and press A.
Note that if you are editing a document when an alarm "goes off" the message will not appear - you must press STOP to read the message.
Secret Information
For step by step instructions read Section 1.
For information that you might like to keep on your Notepad but do not wish others to access (for example, passport number, bank accounts and credit card details or private telephone numbers) we have provided a "Secret Information" screen which can only be accessed by typing a password that you have set up.
Set up your Password
Hold down FUNCTION and press MENU, you will see the following screen:

Type In any combination of four letters and/or numbers and press RETURN. You can use capital or lower case letters. The password is totally secure, so if you ever forget it you will not be able to access your information, you can only delete it so - DON'T FORGET YOUR PASSWORD.
You will be asked to confirm your password. Type exactly the same sequence again then press RETURN.

You can now type in your "secret information", you can edit the text in the same way as you edit a word processor document (although you cannot print). Press STOP when you have finished. Next time you want to refer to your secret information hold FUNCTION and press MENU then type in your password.
Complete Password Protection of your Notepad
You can set a Password Lock to protect all the information In your Notepad using your Secret Information Password.
If you have not already done so set-up your password as described in "Set up Your Password" above.
Anytime you want to set the Password Lock hold down CONTROL and press MENU then switch off.

Before the Notepad can be used again the password must be correctly typed and the RETURN key pressed.
Changing your Password
To change the password enter the Secret Information by holding FUNCTION and pressing MENU and typing your current password. Then press the MENU key:

Type in your current password:

Type in your new password.
| Important: If you cannot remember your old password it is impossible to change the password or to access the Secret Information. |
If you forget your password
The password protection on your Notepad is totally secure, so if you forget your password you have no option but to erase your Secret Information or, if you have set the Password Lock, to erase all your work held in the Notepad memory including documents, diary entries, addresses etc. as well as your Password by resetting the Notepad.
Erasing your Secret Information and Password
To erase the Secret Information:
- Hold down FUNCTION and press MENU:
- Hold down the FUNCTION key and press DELETE.
Press Y to confirm that you do want to delete the information. All your Secret Information as well as your Password will be erased.
Resetting Your Notepad
This will erase all your work stored in the Notepad memory as well as your password. If you are using a memory card the addresses and documents stored on it will not be erased.
Switch off your Notepad then hold down FUNCTION and STOP together with the DELETE key on the right and switch on the computer.
To prevent accidental reset you cannot use "sticky shift" (single key operation).
If the reset Is effective you will hear an extended "beep". If you have not held the keys down properly it will not reset. Try again.
System Settings
The system settings menu is accessed only from the main screen by pressing MENU.
The factory settings are as follows:

Document size and date display
These will show against the name of each document in the LIST STORED DOCUMENT screen. The size of each document is shown in bytes with the date and time you last edited the document.
Where the document is stored in memory is indicated by an initial. C means stored on a memory card, U means stored in the Upper memory, L means stored In Lower memory, this is only of any interest to you if you start to run out of memory and need to delete documents, delete those in the Lower memory to make room when you are editing a large document.
To display the size and date use LEFT or RIGHT to change the setting from "Not shown", you then have a choice of date format press RETURN on the format you prefer.
Automatic Power Off delay
If you find the automatic power off time of 5 minutes is too long, reduce the time to between 1 and 4 minutes. Do not set the delay to 0 (never) if you are running the Notepad from the batteries as this will prevent automatic power off occurring.
Preserve Context
If, when you switch on, you want your Notepad to return to the screen you were using when you switched off change this setting to Yes. Context is always preserved when automatic power off occurs.
Sticky Shift keys
To allow one-key operation of the Notepad switch "sticky shift" on, where normally you would have to press two keys at the same time, this allows you to press one ofter the other. So, for example, to spell check o document when word processing you could first press the YELLOW (FUNCTION) key then press 1.
Document Transfer port/Format
Use this to set Serial or Lapcat (Parallel) and Protext/ASCII, refer to the section on transferring documents for more information.
Time display format
To change the time dlsplay to the 12 hour clock use the LEFT RIGHT cursor keys. Note that this only affects the display of time. You must still use the 24 hour system when setting the time or alarms.
Set time and date
To change the time and/or the dote press MENU at the main screen the press RETURN or DOWN until you see the following screen:

Set the time and date as described in the first section of this book. Note that the seconds are set to zero as you press RETURN after setting the minutes. Use the 24 hour clock even if you have changed the Time display format.
(Don't use this method to change the time and date if you have travelled abroad to another time zone, select the correct Time Zone in the Time Manager instead.)
Tim's Amstrad NC Users' Site |
| Home | Features | Data Sheets | Questions | BBC BASIC | Software |